DJ on a Bike
Posted on 2025-06-07 in posts
Music on the Move
Backgrond
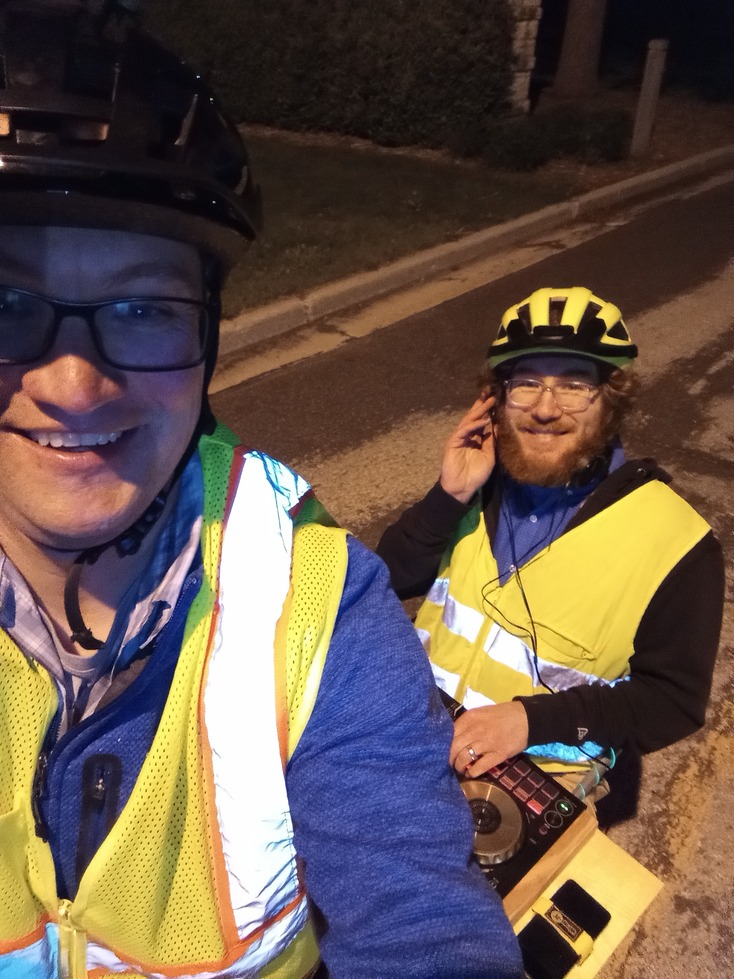
Inspired by this video of a person playing the piano on the back of a cargo bike, I have wanted to add music to our Spicy Curry since we bought it. No one in my family plays piano and even a novice DJ can play coherent music so I decided on a DJ setup.
Parts
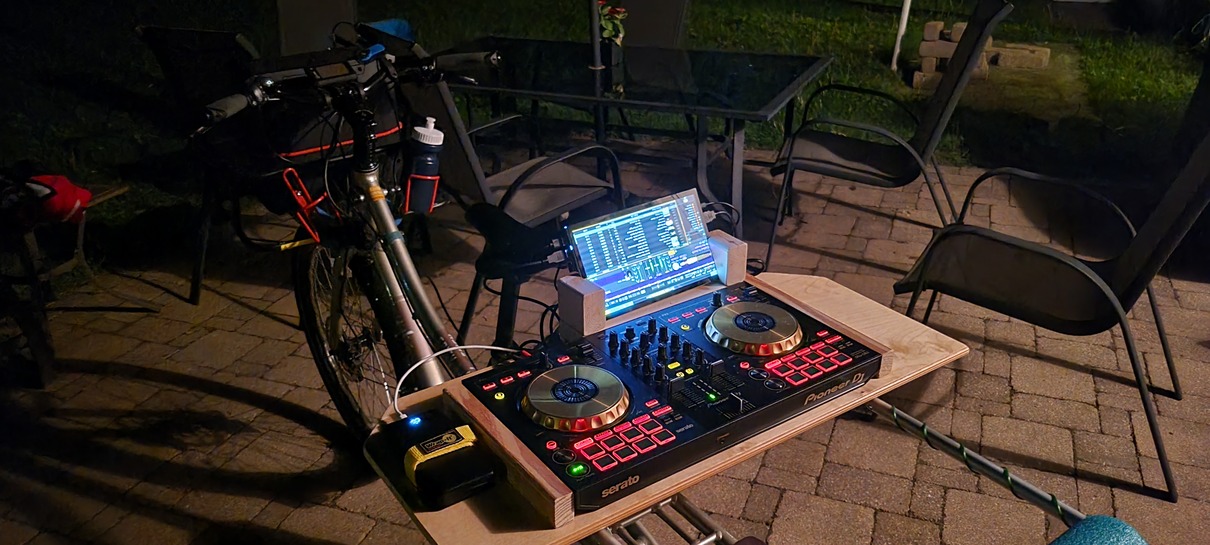
- Raspberry Pi 5
- 10" touchscreen display (touchscreen isn't necessary but it helps with adjusting mixxx settings)
- DJ Controller
- Bike with passenger seating
- Batter pack
- Portable speaker
- Cables
DJ Software
I used fayaaz's mixx-pi-gen fork because it handled a lot of the installation and configuration of mixxx. The controller I am using, a Pioneer DDJ-SB3, had a mapping already built-in to mixxx so no additional configuration was needed. The DDJ-SB3 also has a build in audio card so I connected it to the portalble speaker with a 2-channel RCA <-> 3.5mm cable. The controller is connected (and gets its power) from the RPI with a USB Type-A <-> USB Type-B cable. I suspect that connecting the RPI to the speaker with bluetooth would insert so much lag that mixxing would be near impossible.
Speaker
I found a ION Sport Go portable speaker for cheap. I replaced the battery and it is good to go. I looked for RCA inputs on the speaker as I thought they would be a little sturdier on bumpy paths. The the ION was the right price as well as weather resistant. Make sure the speaker fits in the front basket of your bike without hindering the handelbars. A few pool noodles on the bottom and sides of the bread basket (yuba's term for the front basket) offer a softer ride for the speaker.
Power
During initial tests the RPI would power cycle as soon as the controller was plugged in. My assumption was that the controller was drawing too much current for the 3 amp chunky I was using. I read that the RPI 5 can handle up to 5 amps at 5 volts so I ordered a semi-official 5.1 volt 5 amp chunky. Using this wall plug, it worked properly. There were no 5V5A power banks that I could find so we experimented with some USB-PD voltage selectors and a buck converter to request 9V from a USB-PD battery pack and convert to 5V with the buck converter. If we can draw 9V3A we should get close to 5V5A after conversion. This solution also didn't work.
We later disovered that power on the RPI 5 USB ports is limited to 600mA unless the official power supply is used. Here is a good reddit thread on the topic. You can add a line to your /boot/config.txt file to enable up to 1.6 amps on the USB ports even with other power supply's
usb_max_current_enable=1
I considered powering the 10" display from an alternate source but the mouse touches are handled throught same USB interface and the touchscreen is handy. You can use a wide variety of portable batttery packs to power the RPI now. I found a reasonable priced 20,000 mAh Anker battery pack (A1383) on eBay that works well.
Orientation
The hdmi and usb connectors on the 10" display are on the bottom left side of the screen. Construction of the screen holder proved easier of the display was upside down and the ports were at the top left. Many resources suggest adding lcd_rotate=2 to /boot/config.txt but this only works with official RPI display. Another suggested route is within the display settings of the Raspberry PI OS GUI. Since mixxx-pi-gen uses a stripped down OS and the sway window manager, there is no GUI configuration.
After figuring out the name of my display, I added the following to ~/.config/sway/config
output HDMI-A-1 transform 180
input type:touch calibration matrix "-1.0" 0.0 1.0 0.0 "-1.0" 1.0
The first line rotates the display and the second transforms the mouse clicks to match the rotated display.
Construction
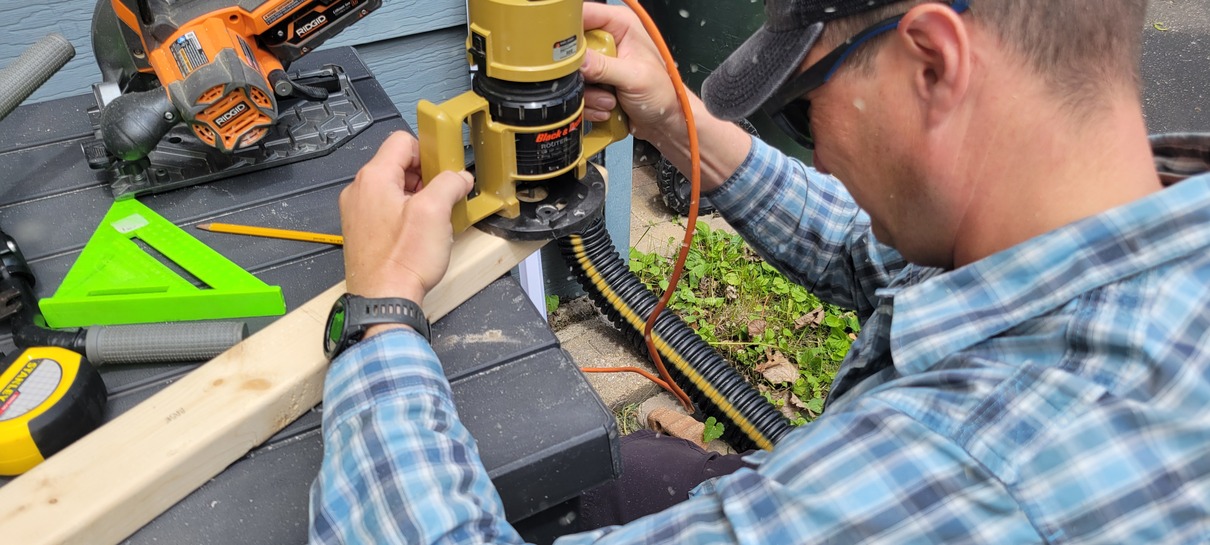
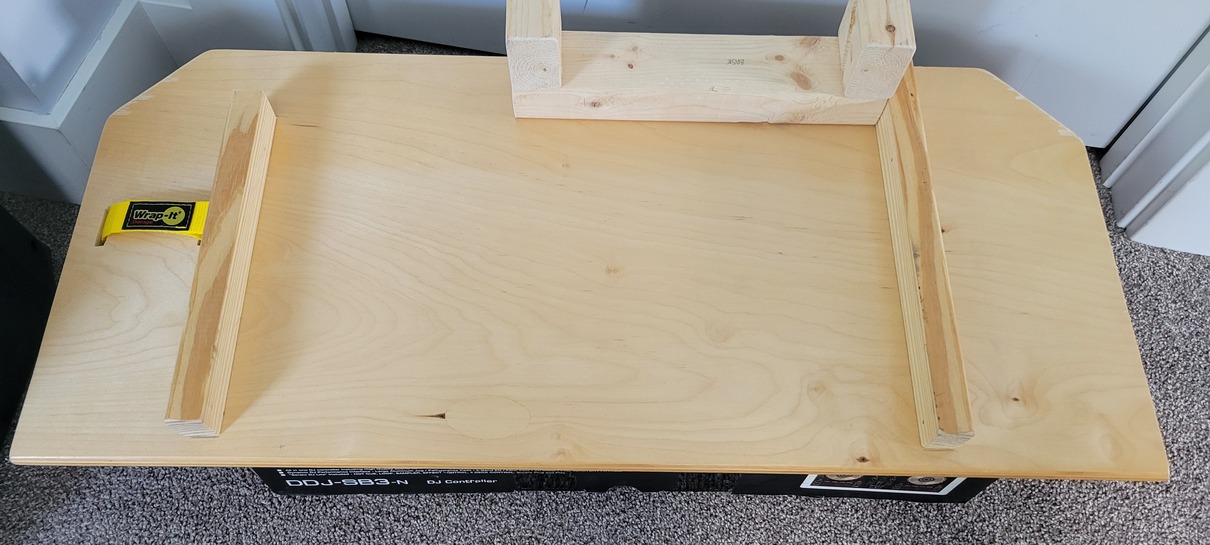
Brother Joe helped with the design and building of the wood table to hold the controller and batter pack. Some small wood segments hold the controller centered. A velcro strap holds the battery in place. Two 2x4's with a slot routered in them hold the touchscreen. The RPI is attached to the back of the touchscreen.
We raised the monkey bars to accomodate a rider with longer legs. We added a small section (~17 cm) of 2x4 in between the monkey bar and the bike frame. A longer 5mm x 60mm screw is needed.

The first ride was challending because we hadn't figured out the screen rotation yet so the display was upside down. But we still had fun!